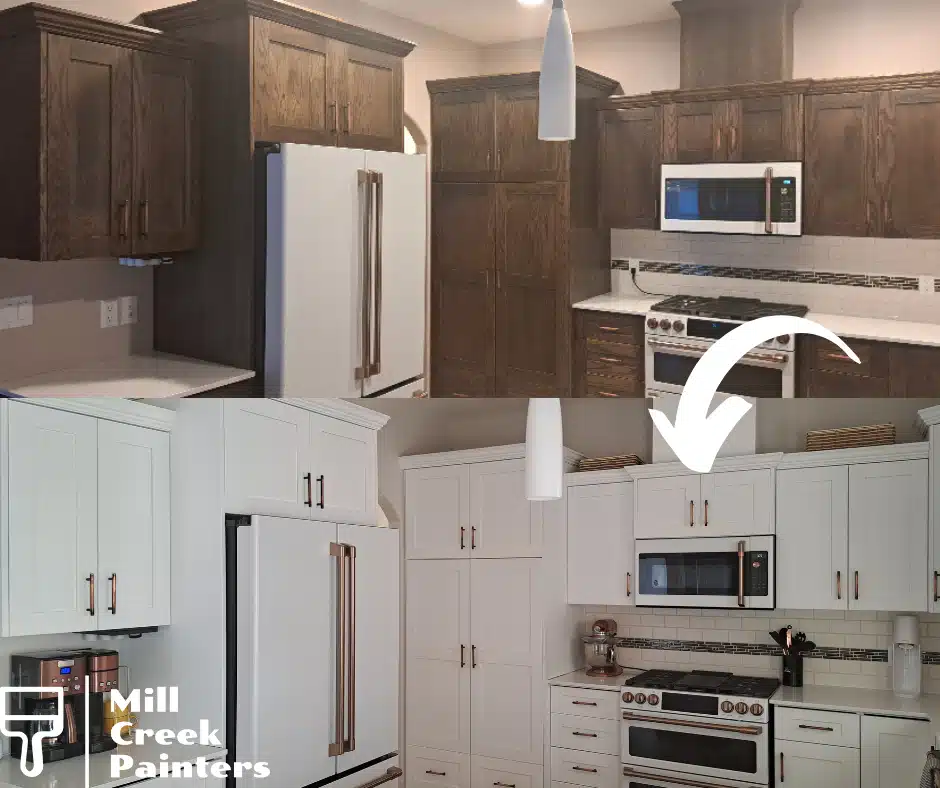
Are your kitchen cabinets showing signs of wear and tear? Do you desire a fresh, updated look without the hefty price tag of a complete kitchen renovation? Refinishing your kitchen cabinets can be a cost-effective and transformative solution. In this blog post, we’ll guide you through the process of refinishing kitchen cabinets, providing valuable insights and tips. However, we’ll also emphasize the benefits of hiring professionals like Mill Creek Painters Ltd., who can save you time and ensure a flawless finish.
1. Assessing Your Cabinets:
Begin by evaluating the condition of your cabinets. Determine whether they are structurally sound and suitable for refinishing. Take note of any repairs or replacements needed before starting the refinishing process.
2. Gather the Necessary Materials:
To embark on your cabinet refinishing journey, gather the following essential materials: sandpaper (various grits), paint or stain, primer, brushes, rollers, paint trays, painter’s tape, drop cloths, and a screwdriver.
3. Prepare the Workspace:
Create a designated workspace by clearing out the kitchen and protecting surrounding surfaces with drop cloths. Use painter’s tape to cover areas that won’t be refinished, such as countertops and appliances.
4. Remove Cabinet Hardware and Doors:
Carefully remove all cabinet hardware, including handles, knobs, and hinges. Take care to label each piece, ensuring easy reinstallation later. Next, remove the cabinet doors by unscrewing the hinges.
5. Clean and Degrease:
Thoroughly clean the cabinet surfaces using mild detergent, warm water, and a soft cloth. Pay close attention to areas with grease buildup, as proper cleaning ensures optimal adhesion of the new finish.
6. Sanding:
Begin sanding the cabinet surfaces using sandpaper with medium grit, gradually moving to finer grits for a smoother finish. Sanding helps remove old paint or finish, smooth out imperfections, and promote the adhesion of the new coating.
7. Apply Primer:
Apply a high-quality primer to the sanded surfaces. Primer helps seal the wood and creates a smooth base for the paint or stain. Use a brush or roller to ensure even coverage, paying attention to any intricate details or crevices.
8. Painting or Staining:
Choose your desired paint or stain colour and apply it to the cabinets using a brush or roller. Follow the manufacturer’s instructions for proper application techniques, including the number of coats required. Allow adequate drying time between coats.
9. Reattach Cabinet Doors and Hardware:
Once the paint or stain has fully dried, reattach the cabinet doors using the labelled hardware. Take your time to align the doors properly and ensure a seamless fit. Install the handles, knobs, and hinges to complete the look.
While the DIY approach to refinishing kitchen cabinets can be rewarding, it’s essential to highlight the advantages of hiring professionals like Mill Creek Painters Ltd.:
a. Expertise and Experience: Professional painters bring years of experience and knowledge, ensuring a high-quality and durable finish.
b. Time-Saving: Refinishing cabinets can be a time-consuming task. By hiring professionals, you can focus on other priorities while they efficiently handle the project.
c. Flawless Results: Professionals have access to premium materials, tools, and techniques, resulting in a flawless and long-lasting finish that DIY projects may struggle to achieve.
d. Customization and Design Advice: Professional painters can offer valuable insights and recommendations for colour choices, finishes, and design elements that align with your vision and complement your kitchen’s aesthetic.
Refinishing kitchen cabinets can breathe new life into your kitchen space, offering a cost-effective way to update its look. The average cost for a professional like Mill Creek Painters to refinish a kitchen ranges from $3,500 to $7,000. Get a free estimate today!