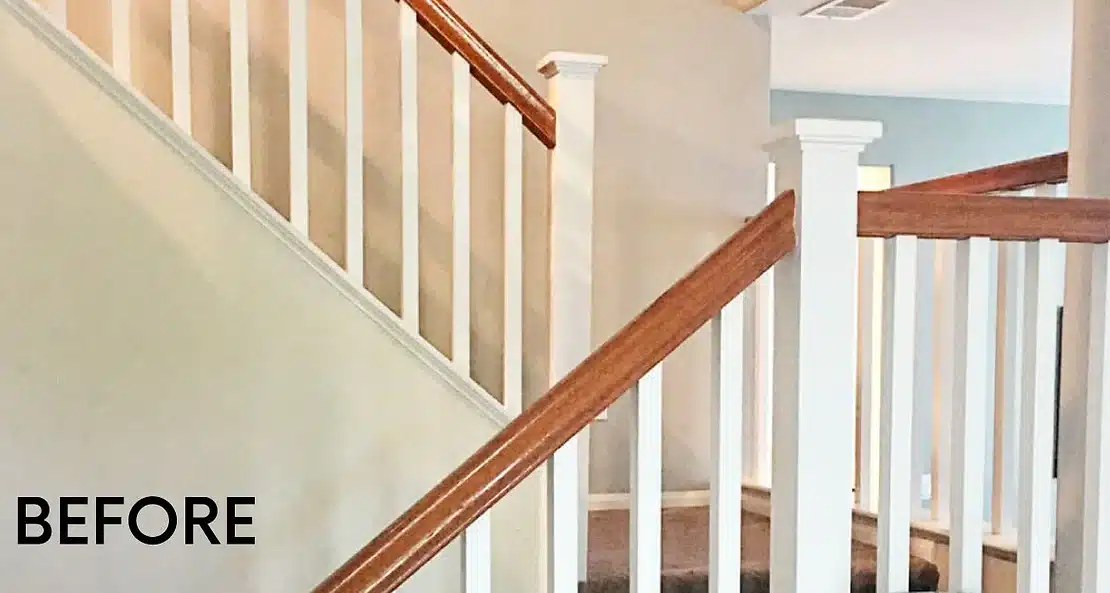
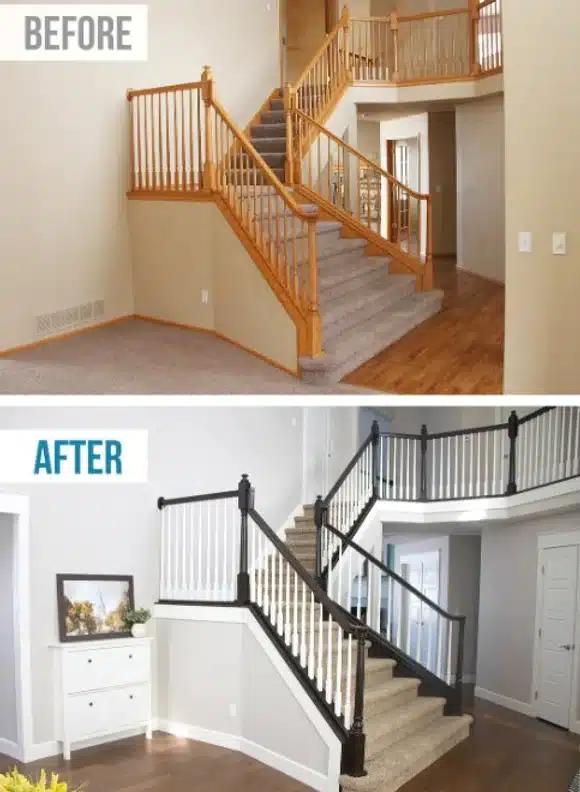
Oak railings can add elegance and charm to any staircase or balcony. However, over time, the wear and tear can dull their appearance and detract from the overall aesthetics of your home. That’s where the importance of refinishing oak railings comes in. By giving them a fresh coat of enamel paint, you can restore their beauty and make them look brand new.
Refinishing oak railings not only enhances their visual appeal but also protects them from further damage. The paint acts as a protective barrier against scratches, stains, and moisture, ensuring the longevity of the railings. Moreover, a well-refinished railing can significantly improve the overall ambiance of your interior space or exterior facade.
Whether you’re planning to sell your home, host gatherings, or simply want to revitalize your living space, refinishing oak railings is a cost-effective way to achieve remarkable results. It allows you to transform outdated and worn-out railings into stunning focal points that elevate the aesthetic value of your home.
In the following sections, we will discuss the essential steps and techniques for refinishing oak railings with enamel paint. From the preparation process to the application methods, you’ll gain valuable insights that will enable you to tackle this DIY project with confidence. So, let’s dive in and discover how to bring new life to your oak railings through the art of refinishing.
Preparation: The Key to Successful Railing Refinishing
A. Sanding Off the Gloss
- Explaining the Need to Remove Existing Gloss for Better Paint Adhesion Before you begin the process of refinishing oak railings, it’s crucial to sand off the existing gloss or finish. The glossy surface of the railings creates a barrier that makes it difficult for the new paint to adhere properly. By sanding off the gloss, you create a rougher surface that allows the paint to bond effectively, ensuring a longer-lasting finish.
- Importance of Using Appropriate Sandpaper Grit Choosing the right sandpaper grit is essential for effective sanding. For oak railings, start with a medium-grit sandpaper (around 120 to 150 grit) to remove the existing gloss. This grit is rough enough to create a textured surface but not too abrasive to damage the wood. Once the gloss is removed, switch to a finer grit (around 220 to 320 grit) to smooth out the surface before priming and painting.
B. Priming All Surfaces
- Benefits of Priming to Enhance Paint Durability and Adhesion Priming is a crucial step in the refinishing process as it provides several benefits. Firstly, it creates a stable surface for the paint to adhere to, ensuring better durability and longevity of the finish. Secondly, primer helps to block stains and prevent them from bleeding through the paint. Additionally, it promotes better color consistency and improves the overall appearance of the finished railing.
- Recommended Primers for Oak Railings When selecting a primer for oak railings, choose one specifically designed for wood surfaces. Look for a high-quality bonding primer that offers excellent adhesion. Oil-based or shellac-based primers are often recommended for their superior bonding properties. Ensure the primer is compatible with the type of enamel paint you’ll be using for the best results.
C. Multiple Coats of Enamel Semi-Gloss Paint
- Explanation of the Number of Coats Required for a Complete Refinish To achieve a professional-looking finish, multiple coats of enamel semi-gloss paint are typically required. Oak railings, especially if they were previously dark or stained, may require up to four coats of paint to achieve complete coverage and a consistent color. Applying multiple thin coats allows each layer to dry properly and minimizes the risk of drips or uneven coverage.
- Advantages of Using Enamel Semi-Gloss Paint Enamel semi-gloss paint is a popular choice for refinishing oak railings due to its durability and easy maintenance. It provides a smooth and glossy finish that is resistant to stains, chipping, and wear. The semi-gloss sheen adds a touch of elegance to the railings while still offering some resistance to smudges and fingerprints. Furthermore, enamel paint is known for its excellent adhesion and ability to withstand heavy use, making it ideal for high-traffic areas like stair railings.
By investing time and effort in the preparation stage, including sanding, priming, and applying multiple coats of enamel semi-gloss paint, you’ll ensure a successful and long-lasting refinishing project for your oak railings. The next section will delve into the various application methods you can use to achieve the desired finish.
Application Methods for Oak Railing Refinishing
A. Brush and Roller Technique
Step-by-step Guide for Using a Brush and Roller
- Start by thoroughly mixing the enamel paint to ensure consistency.
- Dip the brush into the paint, removing any excess by gently tapping it against the container.
- Begin applying the paint to the oak railing using long, smooth strokes, following the grain of the wood.
- Work in small sections, typically 2-3 spindles or one section of the railing at a time, to avoid drying lines.
- Once the paint is applied, use a roller to smooth out any brush marks and create an even finish.
- Repeat the process for each section until the entire railing is covered.
- Allow the first coat to dry completely before applying subsequent coats as per the paint manufacturer’s instructions.
- Apply additional coats, if necessary, until you achieve the desired level of coverage and smoothness.
Tips for Achieving a Smooth and Even Finish
- Use high-quality brushes and rollers to ensure smooth application.
- Work in a well-ventilated area to allow the paint to dry properly.
- Avoid applying too much pressure with the brush or roller to prevent paint buildup or unevenness.
- Maintain a consistent speed and pressure while applying the paint for a uniform finish.
- Check for any drips or excess paint and promptly smooth them out before they dry.
B. Spraying Technique for a Premium Look
Detailed Process of Using a Paint Sprayer
- Choose a high-quality paint sprayer suitable for enamel paint application.
- Prepare the sprayer according to the manufacturer’s instructions, including thinning the paint if necessary.
- Cover nearby surfaces and protect surrounding areas from overspray using drop cloths or plastic sheets.
- Begin spraying the paint onto the oak railing, starting from the top and working your way down.
- Keep the sprayer moving in a steady and controlled motion to achieve an even coat.
- Apply multiple thin coats, allowing each coat to dry before applying the next one.
- Pay extra attention to the corners, edges, and intricate details of the railings to ensure complete coverage.
- Highlighting the Additional Prep Time Required for Spraying While spraying can provide a premium and flawless finish, it requires more preparation time compared to the brush and roller technique. Some additional considerations for spraying include:
- Thoroughly masking and covering areas not intended to be painted to prevent overspray.
- Setting up proper ventilation or using protective equipment such as masks and goggles to avoid inhaling fumes or paint particles.
- Taking extra care to clean and maintain the sprayer regularly to ensure its optimal performance.
By choosing the appropriate application method and following the step-by-step instructions, you can achieve a beautiful and professional-looking finish for your oak railings. Next, we will address the unique challenges and considerations when refinishing railings with metal spindles.
Refinishing Metal Spindles: Taping and Protection
A. Challenges of Painting Metal Spindles
- Discussing the Intricacies of Painting Metal Surfaces Painting metal spindles poses unique challenges compared to wood railings. Metal surfaces may have different textures, finishes, and potential rust or corrosion issues. It is essential to address these challenges to ensure a successful refinishing project.
- Importance of Taping Off and Protecting the Spindles Taping off and protecting the metal spindles during the painting process is crucial to achieve a clean and professional-looking finish. By preventing paint overspray or accidental brush strokes on the metal, you can maintain the visual integrity of the spindles and avoid time-consuming touch-ups or cleaning.
B. Recommended Techniques for Taping and Protection
Best Practices for Taping and Covering Metal Spindles
- Begin by thoroughly cleaning the metal spindles to remove any dirt, dust, or rust. Use a mild detergent or metal cleaner, followed by rinsing and drying the surfaces.
- Once the spindles are clean and dry, apply painter’s tape along the edges and areas where the metal meets the wood or any surfaces you want to protect from paint.
- Consider using plastic or drop cloths to cover the wood railings, stairs, or any adjacent areas to protect them from accidental paint splatters.
- Ensure the tape is firmly pressed down, creating a secure barrier between the metal spindles and the paint application.
- Use a small brush or foam brush to carefully paint the metal spindles, focusing on smooth and even strokes.
- Allow the paint to dry completely before removing the tape and protective coverings.
Tips to Ensure a Clean and Professional-Looking Finish
- Take your time when taping off and covering the metal spindles to ensure precision and thorough protection.
- Use high-quality painter’s tape that adheres well to metal surfaces and removes cleanly without leaving residue.
- Avoid excessive paint application, as it can lead to drips or pooling on the metal spindles.
- Check for any missed spots or imperfections and address them promptly to maintain a consistent finish.
By paying attention to the intricacies of painting metal surfaces and implementing proper taping and protection techniques, you can achieve a seamless and flawless result for both the wood railings and metal spindles. In the next section, we will discuss the longevity of a properly refinished oak railing and provide tips for maintenance.
Longevity of Refinished Oak Railings
Refinishing oak railings not only enhances their appearance but also offers several benefits that contribute to their longevity and durability.
Benefits of a Properly Refinished Railing Refinishing oak railings provides the following advantages:
- Enhanced Protection: The new paint acts as a protective barrier, shielding the wood from scratches, stains, and moisture.
- Improved Aesthetic Appeal: A fresh coat of paint rejuvenates the railings, making them visually appealing and complementing your overall interior or exterior design.
- Increased Durability: Properly refinished railings can withstand everyday wear and tear, maintaining their quality and beauty over an extended period.
Estimating the Lifespan Before Touch-ups or Refreshing Are Needed The lifespan of a refinished oak railing can vary depending on several factors, such as the quality of the paint, the amount of usage, and the level of maintenance. On average, a properly refinished railing can last up to 10 years before touch-ups or refreshing are needed. However, it’s essential to monitor the condition of the railing regularly and address any issues promptly to prolong its lifespan.
Tips for Maintenance and Prolonging the Finish’s Durability
To ensure the longevity and durability of your refinished oak railing, consider the following maintenance tips:
- Regular Cleaning: Wipe down the railing periodically with a damp cloth to remove dust, dirt, and grime. Avoid using harsh chemicals or abrasive cleaners that may damage the paint or wood.
- Avoid Excessive Force or Impact: Be mindful of any heavy impacts or excessive force on the railing, as they can cause scratches or dents. Take extra care when moving furniture or other objects near the railings.
- Prevent Moisture Damage: Avoid prolonged exposure to water or moisture, as it can lead to warping, swelling, or paint deterioration. Wipe up spills promptly and ensure proper ventilation to prevent moisture buildup.
- Touch-up as Needed: Keep an eye out for any areas where the paint may have chipped or worn down over time. Touch up these areas with matching paint to maintain a consistent appearance and protect the wood.
- Periodic Inspection: Regularly inspect the railings for signs of damage, such as cracks, peeling paint, or wood decay. Address any issues promptly to prevent further deterioration and maintain the integrity of the railing.
By following these maintenance tips and addressing any necessary touch-ups or repairs, you can prolong the life of your refinished oak railings and enjoy their beauty and functionality for years to come.
In conclusion, refinishing oak railings with proper preparation, multiple coats of enamel semi-gloss paint, and the appropriate application techniques can revitalize the appearance of your railings. Additionally, maintaining the refinished railings through regular cleaning, careful usage, and timely touch-ups will help maximize their longevity and keep them looking fresh and appealing.
Conclusion
Refinishing oak railings with enamel paint is a rewarding DIY project that can transform the look of your home. By emphasizing the importance of preparation, application techniques, and maintenance, you can achieve a professional and long-lasting finish for your railings.
Proper preparation, including sanding off the gloss, priming all surfaces, and applying multiple coats of enamel semi-gloss paint, is crucial for ensuring paint adhesion and durability. Taking the time to prepare the surfaces properly will yield exceptional results.
Choosing the right application method, whether using a brush and roller or a paint sprayer, allows you to achieve the desired finish for your oak railings. Following step-by-step instructions and utilizing helpful tips will help you achieve a smooth and even application.
When refinishing railings with metal spindles, taping off and protecting the metal surfaces is essential. This will prevent accidental paint application and ensure a clean and professional-looking finish. Taking care to address the challenges of painting metal surfaces will contribute to the overall success of your project.
A properly refinished oak railing offers numerous benefits, including enhanced protection, improved aesthetic appeal, and increased durability. With proper maintenance, your refinished railings can last up to 10 years before needing touch-ups or refreshing. Regular cleaning, avoiding excessive force or impact, and periodic inspections will help prolong the finish’s durability.
In conclusion, I encourage you to embark on the DIY project of refinishing your oak railings. It is a cost-effective way to revitalize your space and add a fresh touch of elegance to your home. By following the outlined steps and tips, you can achieve remarkable results and enjoy the beauty of your refinished railings for years to come. So, grab your brushes and rollers, and get ready to transform your oak railings into stunning focal points that elevate the overall ambiance of your living space.